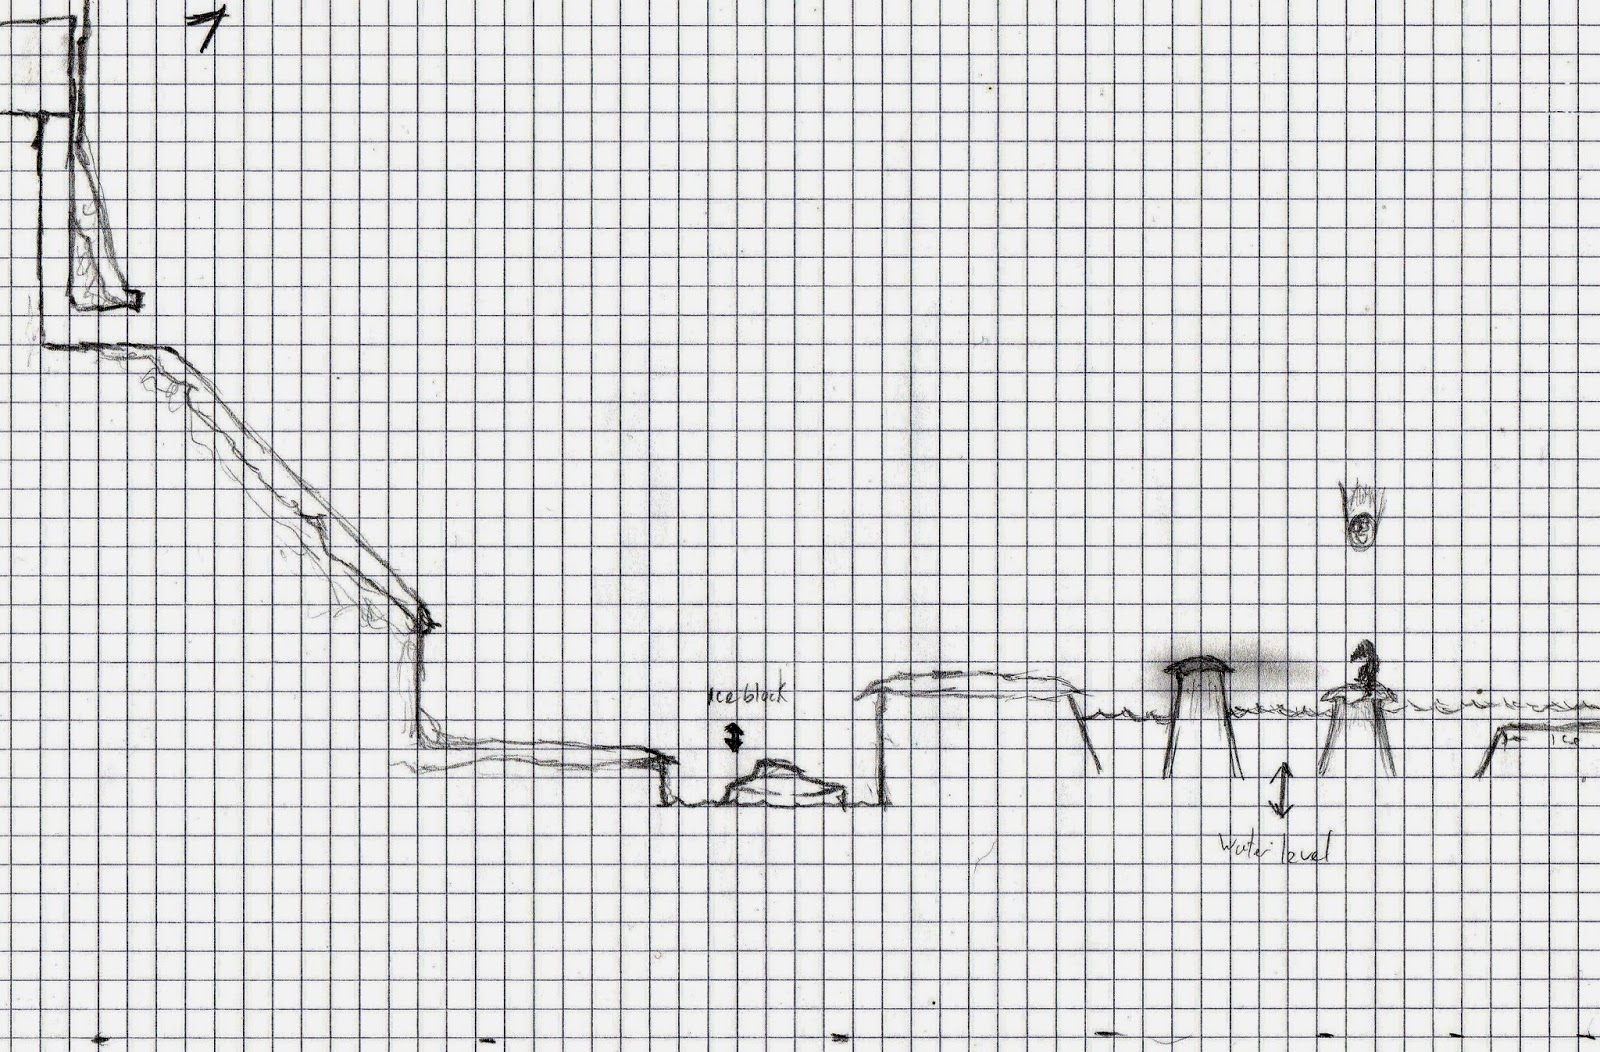
After the forest level had been grey boxed and the basic mechanics for the forest level had been put together I started on the level designs for the next two sections of our game. Both the Ice and Fire sections are significantly shorter than the forest section. This is mainly due to the increased difficulty of these sections and also due to the fact that the forest level was made longer to accommodate new players learning the controls.
These scans are in the same order that the levels should be played in.
Wednesday, 12 March 2014
Game Dev: The Game
Game name not final but just trying a mixture of photoshop tools; more to come.
This poster sized image was done in a program called Hexels, a grid based art program that allowed you to paint with shapes. I'm quite happy with the outcome and would like to try some more pieces in this program in the future as i really like the isometric old school effect. More to come!
Monday, 10 March 2014
Amended Group Schedule
Unfortunately due to problems with the progression of our game we have had to write an amended group schedule. This new schedule is far more realistic and is more appropriate for the time we have remaining. We have roughly 8 weeks of development time left and have decided to plan this out 4 weeks at a time. Below is the new schedule for the first 4 weeks that we have remaining.
At some point during the 4th week of this schedule the group will meet again to discuss and plan our schedule for the last 4 weeks of development.
Friday, 7 March 2014
Main Character Animations and Mecanim
Once Jez had finished modelling and texturing the main character, I was able to bring it into unity to start implementing it into our current character controller and to begin setting up our animations using mecanim. Firstly I would like to mention that as none of us in our group are strong animators we chose to use a default set of animations for our game that we downloaded, in order to give us as much time to polish the other areas of the game.
Once I had built a collection of suitable and free animations I had to import them into unity and start setting up the human rig for our character to ensure that the animations would match up with the rig of our character.
Once the animations were checked out I had to begin using Mecanim to create the transitions between our animations so that a state machine could be set up in order for our animations to replicate our character controllers movement.
Standard Enemy
This model is low poly and will be duplicated 3 times for each of the variations
The texture only needed to be painted once as each of the enemies is the same it is just the colour way that changes.
Each of the enemies has its own accessories particular to the world that they feature in. Each of the accessories are separate models.
The forest standard enemy has antlers
leaf arm guards
wood shin pads
the leaf and wood guards are just planes with alpha maps on them.
The Ice versions only additions are icicles, these are all the same model, just a cone with the bottom face deleted to save on polys, turned slightly transparent and tinted blue.
The Fire version only has a mask however the leg texture is different to the other two so that had to be painted over the original texture.
Wednesday, 5 March 2014
Low poly forest assets
Here are some forest assets i did at the time to test out the low poly trianglated look we are going for. Most of these are just simple environmental assets based on my earlier concepts. Most of these will act as either platforms or just peices for the backgrounds.
At the moment all assets will be block colured with a quite saturated look, once we've got these peices in Unity, we shall then really play around with how they look with lighting or screen filters.
- Large_Ruin_wall
- Small_Ruin_wall_01
- Small_Ruin_wall_02
- Fallen_Log
- Tree_Stump
- Ruin_Pillar
- Plant_Platform_01
- Plant_Platform_02
- Mushroom
At the moment all assets will be block colured with a quite saturated look, once we've got these peices in Unity, we shall then really play around with how they look with lighting or screen filters.
- Large_Ruin_wall
- Small_Ruin_wall_01
- Small_Ruin_wall_02
- Fallen_Log
- Tree_Stump
- Ruin_Pillar
- Plant_Platform_01
- Plant_Platform_02
- Mushroom
Tuesday, 4 March 2014
Environmental art direction - Low poly look
As art director, i have decided that we need to finalize the visual art style. As we are under time constrains at the moment i have thought over what we can do, that is fast but we can still achieve a style that fits our game. Originally we were planning on doing chunky models and hand-painted textures, but i believe to really get nice looking hand painted textures, we would need to spend a lot of time on painting. We have changed our style to more of a deliberate low poly look. Here are some examples of what we would like to aim for.
After playing around with some tools in Maya, i have managed to create some rough prototypes of how we can go about achieving this style.
Here is the step by step process;
Step 1:
First, we need to give the model a more chunkier look, this is done with the transform component tool.
Select entire mesh in vertex mode.
Edit Mesh > Transform Component
(Tweak around with the settings for more of a random change in vertices)
Once you've applied the transform vertex, move either of the axis to move all the vertices in random directions. This give us the chunky geometry, lovely.
Step 2:
Next, we need to triangulate the mesh.
Mesh > Triangulate.
This give us the tris we want to show through, therefore giving us the low poly look.
Step 3:
Next we can use the reduce tool, to lower the poly count, this step isn't need but it's worth playing around with the settings to see what effect we can achieve.
Mesh > Reduce
Step 4:
Finally, so we can see the triangulated edges, select all faces and then all we need to do is harden the normals.
Normals > Harden edge
All done! Using this method i believe we shall be using block colours, probably more desaturated but that is something we shall play around with once all the assets are in game.
Subscribe to:
Posts (Atom)


