Labels

Thursday, 5 December 2013

Mechanic Movement Updates

Now that the main characters motor script is in the process of being finalized I have begun to make a start on scripting the mechanics for our controllable companion the "Mechanic". So far this has only involved scripting the Mechanics movement as this is required to be able to get any other features working.

As with the main characters motor script I have been through two attempts to get the script up and running. The first iteration of this was a incredibly simple script that used a set of boundaries to keep the Mechanic following the player when they are moving combined with the use of the mouses position to control the mechanic once you switch to it. Bellow is a snippet of this script that demonstrates how this basic movement worked.


However this had be scrapped as firstly the boundary system that was used to make the mechanic follow the player gave unpredictable movement that appeared jittery on screen. Secondly as we have now made the decision to make the game controller compatible, the idea of using the mouse to control the mechanic became obsolete.

I then re-wrote the script and instead of using the mouse position to control movement, I recycled some of the main characters movement code to base the new system off the same key presses as main characters movement. It is also based off the same acceleration system with some slight alterations to make the movement better represent that the Mechanic is floating.

The main method that was used to achieve this affect was to incorporate a sine wave to all of the movement made by the Mechanic. This sine wave gives the appearance of floating as the Mechanic will now slightly move up and down smoothly as you move.

This code snippet shows how the sine wave was achieved:


 While the updated movement script was based off the working motor script of the main character some aspects had to changed as the character motor script controls a character controller where as the Mechanic is a rigidbody. The other main issue with this attempt was that the Mechanic was being moved by manipulating its transform. The reason for this being an issue is that when you move something via its transform property the object is actually being teleported between different locations on the screen, which results in the affected rigidbody passing through objects with coliders attached.

This problem was eventually fixed by using an in-built move function that draws a line between its current and target positions and will make the rigidbody trace that line 1 point at a time. Which also allows for collisions as the rigidbody can no longer be teleported inside of an objects collider. This function combined with some tweaking of the rigidbodies settings gave the original desired movement.

Below is a snippet of code that shows how the script for this is set out.


Also the issue with the jittery movement when the Mechanic was following the player was fixed by removing the boundaries and have the mechanic constantly lerping to the position of a game object that I childed to the main character in the location that we wanted the mechanic to be.

Friday, 29 November 2013

Sound & Sound Track Design

For the game's sound track i am using Logic pro a music production software that allows for a wide range of sounds and effects.

i have tried to stay relatively true to original 8-bit pieces.  
Rather than samples of live instruments, all sounds are synthetic and created through synthesisers.

however for these pieces i have used live drum samples but applied an effect called 'Bit Crusher' to imitate the 8-Bit sound allowing for better quality and edibility.


Here is a visualisation/Timeline of the track and the elements with headings at the start of each section 


Here is the audio

Bare in mind, These are short snippets of each worlds sound track and after the intro section of each will be looped until the level is completed e.g 

Start menu will be looped between - 0:27 to 0:41

Fire world will be looped between - 1:17 to 1:30

Ice world will be looped between - 2:07 to 2:20


Monday, 25 November 2013

Game Developer - Modelling progress.

Like the schedule says i started modelling the main character this week. Using symmetry and box modelling i blocked out the basic shapes and overall size of the character first. Getting the chunky features and stylized body shape was important first. I am happy with the legs and body but when it came to do the head i had a few problems, heads are not my strongest point in modelling but i am not leaving it how it is. I would like to go back and give the head more defining features but with a cartoon stylized look its hard to imagine what features he shall have. 


Overall i am happy with the shape of the body, the hair is just a place holder for now i shall need to go back to give the hair a better flow and overall shape.

Scan lines and visual effects

Over the weekend i was doing some research and stumbled across a device called SLG 3000 scan line generator, the SLG 3000 enables you to enjoy the look of authentic arcade style scan lines on a modern television or PC monitor. It can be used with most retro systems provided you first convert the video output to a 640x480 VGA signal. Here is a video demonstration of the device being used with a Dreamcast as it natively outputs in this format so it's ideal for use with the SLG3000:

http://www.youtube.com/watch?v=vscKaVByjRU

Now, obviously this device cannot be used in our game as we are not running from a console but this gave me the idea of emulating scan lines to give our game a true arcade style. Now i am obviously not sure how this could look on a 3d platformer as this look has typically only been on 8-bit/16-bit games due to the the CRT technology at the time. Here is an example of of genuine hardware scan lines- on a 240p source running on a Sony BVM monitor..


Now i believe this would be a really nice effect that should be easily do-able in unity as a full screen shader or screen effect. I can't imagine this being something that is too hard to do, obviously we won't be able to emulate interlaced signals. Here is an example of the difference between non scanlines and scanlines to show the difference.

Another idea would be to have the bubbled/fish eye type screen around the edges, like the older CRT screens with curves glass screens. Here is an example that was done with screen filters on a emulator:


Here is a few more examples of other screen effects and filters and glitched out problems that we can try to integrate into our game, visually and physically. Stuff like this on boot up and when the character dies etc.

Character Movement Updates

Since the previous post on the Unity demo scene, much has been changed to the main characters motor script as during the presentation of our demo scene we found the controls to be too unresponsive and "clunky" causing the level to become much harder to navigate.

Originally the main characters character controller was driven by an axis based system, which was used as the key presses would return an emulated analogue value between 1 and -1. What this effectively means is that when a key was pressed instead of simply acting as a switch and toggling between on and off, when you pressed a key down the returned value would interpolate between 0 and its respective value, 1 for right and -1 for left. 

This decision was originally made for two reasons, the first being that it made scripting the direction change initially easier, as the positive and negative values correspond directly to the direction in which the character needs to move. This allowed me to simply multiply the returned key press value by a set speed to allow the character in the desired direction. This at the time seemed to be much easier than the alternative, which was to use the key presses to then figure out what direction the character should move in and then with that data multiply the move speed by either a positive or a negative number to correspond with the chosen direction.

The second of these reasons being that if we used a controller with an analogue stick to play the game, the player would have more control over the main characters speed, as they could stick to a certain position with the analogue stick limiting the main characters maximum speed.

However during last week this system was scrapped. This was due to the fact that the interpolation of the keys returned value was handled internally by unity which meant that I lost a large amount of control over the values fed into the movement scripts. Which was preventing me from being able to properly integrate a good momentum and inertia based movement system.

I re-wrote the scripts based of the keys acting as switches and created my own acceleration system, that to some extent replicated some of the same effects that was achieved by the axis based system, but this allowed me full control of the values being used to drive the movement script. As I had full control of these values I was able to create a much smoother and complex movement system.


This is a comparison of the two systems being used with just basic movement:


The above is the old system based on the interpolated axis values of the key presses.

This is the updated script with the new system implemented.


Once the basic movement had been finished to a good standard using code snippets that I edited from Unity's default character motor script I was also able to implement support for sliding down steep slopes.

Other features that I have so far been able to implement include:

  • When the character hits an object while moving while in the air they will slow down accordingly.
  • When the character hits an object above them while jumping they are pushed back down with a force that is equal to the force they hit the object with.
  • Jumping is time based, you only jump when the button is pressed down however there is a 0.2 second allowance for human error, so it is possible to jump if you press the button less than 0.2 seconds before you are actually grounded.
  • The motor script supports moving platforms, allowing the character to move along with any platform that may move.
Now that these features have been implemented all that leaves to be done to the character motor script is to bug test it further and eventually attempt to incorporate a system that allows for wall jumping to be achieved.

Hand Painted Textures


This week along with modeling the main character i decided to do some hand painted textures to test my ability in painting and to see what visual style i could achieve. My first test was to try hand painted lava floor, this could be used for platforms or cave walls. I am happy with the finished texture as it tiles quite nicely apart from several rocks that have similar shading directions so if this is too noticeable in game then i can easily repair this at a later date.

This is an example of the same texture tiled. As you can see it isn't the seam that is the problem, there are several similar vertical shaded rocks in the same direction that break the illusion of it being tiled but like i said it isn't TOO much of a noticeable problem but can easily be solved in need by the time it is in game.


Here was another wood test, i was easily able to tile the initial wood planks but i was confused about how to get the details to tile. Once i tried out tiling the lava texture i am a little more confident in making other tileables so i will go back and add a lot more to depth and detail. The colours are still quite bland and the details don't pop so i am nowhere need finished this texture so i will go back to it soon.


Monday, 18 November 2013

Level asset designs


Here i have designed several environmental pieces for the forest themed level that i believe we shall need to model for background purposes. Simply items and assets to fill out the background environment, we would like the level to feel fleshed out and not flat unlike the 2d style games we are going for. I've gone with more basic designs and ideas as we shall most likely need to model A LOT of these types of objects and i think it would be best not to have them too complicated.

Wednesday, 13 November 2013

The Mechanic


Here i dived straight into photoshop to get some basic silhouettes of how the mechanic could look. He is our  navi, our claptrap and loyal companion so we need to get him right. These designs still look gritty but still has a friendly look on him, and i think that is what we will aim for. Homemade bug killing machine with various tools and weapons to solve puzzles and help the developer along his way. I will soon advance more on these and paint up some finished versions.

Silhouettes


Tuesday, 12 November 2013

Scripting and Unity

Toon Shading

After my last post there has been significant progress made to the toon shader. Previously I had encountered a problem with the shaders bands of shadowing and real time shadows creating strange graphical artifacts.

The problem was resolved by disabling the receive shadows property on objects experiencing the artifacts. Also previously the shadowing bands used by the shader were completely procedural and created by the shader code. As this in some cases made the normals of models appear grainy, I created an alternative shader that implemented a ramp texture to be used to create the shadow bands instead, which also allowed me to create smoother shadow transitions.

Both shaders are still in use in the game as we felt as a group that some objects looked better with each type of shadow banding than others.

In the example below, the character on the left has the procedural shadow banded shader applied while the platform in the background and the rock to the right use the ramp texture shader. There is a clear visual difference and we hope to incorporate both to create a good aesthetic for our game.


Character Movement Continued and our Unity Demo Scene

I have been continuing to script the character controller to improve the feel of its movement. As it stands the difference between the new version and the older are quite minimal in appearance. Most of what has been done to change it has simply been re-writing the already existing code that allows me to incorporate sliding, momentum and acceleration far easier. I have also recently scripted in the support for moving platforms as our demo scene has moving platforms implemented in it and without the support for it the character controller would simply fall through the platform.

Modelling

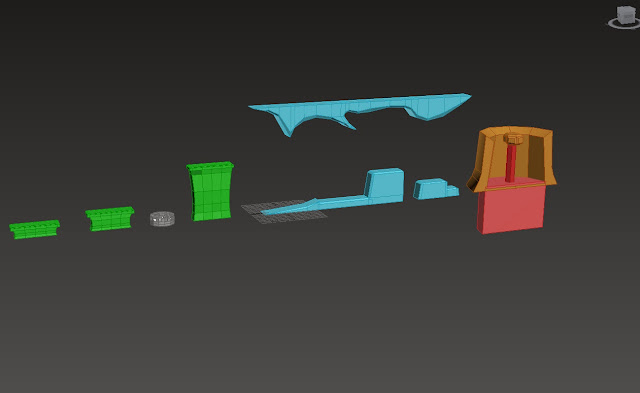
Below is a screen shot of the basic models that I created in 3DS Max to give some sort of visual representation as to how the final game may look. The models are fairly low poly and are acting as simple place holders for the time being. Eventually they will be replaced with the final models, textured and unwrapped.


The Unity Demo Scene

For our pitch I have constructed a basic scene in unity comprised of the above modes. The purpose of this scene is to give a visual representation of roughly how the game may look and also to house some basic mechanics that will be implemented into the final game. The screen shot below shows the scene with all of the models set up before any mechanics have been implemented.


Once all of the models have been correctly positioned I moved on to begin scripting mechanics that demonstrate what sort of mechanics we will be having in our final game, these are however still just basic examples and may be subject to change.

The first was the wind system, this allows the player to jump into a "gust of wind" being generated by some sort of in game object that will slowly push the player upwards giving the appearance that they are being blown from underneath. Also included is an example of how I could possibly use physics materials and rigidbodies to design some puzzles for the ice level.

In the demo scene I have simply applied a physics material to one of the "ice" platforms that represents the properties that a frozen platform may have; very hard and very slippery. To also demonstrate this there is a cube with a rigidbody attached that the player must push along the ice to jump on to to reach the next platform. As this rigidbody is sitting on an object with the ice physics material applied it will carry on sliding after the player has stopped pushing it, to make it appear that the "icy" floors are slippery.

The last level mechanic to be implemented was the moving platforms and rising lava level of the volcanic themed section. Also incorporated in this section is a concept that may potentially make it into our final game. The idea behind this concept is that some objects may break into the foreground and as the player approaches the section that obstructs the foreground and the players view will fade away, allowing the player to clearly see what they are doing. In the demo scene this is represented by a mini volcano that has been split in half. The front half is is hidden once the character approaches it and the re appears when they are further away again. The screenshot below shows the final demo scene set up with all of these mechanics in place.

Also I have implemented a simple death and respawn system to make the demo scene feel like more of a simple game demo.


Anti Axis Schedule - December - May


Environment Concept Art - Elliot Bird

Environment Concepts
Elliot Bird
 
Fire World
 
The fire world is set near and around a volcano, the idea is that as you progress through the level the lava rises forcing you to speed up however these designs show a horizontal gameplay and not a vertical one that had been discussed as a possibility.
 
I like the shapes and hard edges leading to a rigid rockey feel, also colouring only the lava adds to the awareness of it and makes it an obvious danger. The chains i also thinke a solid aestethic, it gives an industiral feel and adds to the gritty atmosphere
 
Te black chain on the top strip is supposedly meant to be interactive indicating that the high platform is lowerable, after detatching the chain from the platform it is attatched to (lower left platform)


This concept i added the Fire World specific enemys into to see how it might look as a working level


Monday, 11 November 2013

Level designs and ideas.


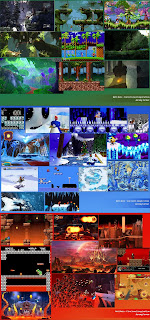
Here i gathered a bunch of game screens with similar environments to get a overall feel of the color pallette and to reference the various themes and styles of each world. 


Here is where i blocked out some platforms and surroundings. This one here is for the Forest level and you can see multiple ideas that we can use to really bring out a forest/ruined temple type environment. The only problem i think is that this concept has more of a jungle feel to it, i felt it was much easier to gain character and bolder silhouettes from doing a more jungle scene but i'm not completely sure that is what we are aiming for. 


Another blocked out scene of how some of the ice level could look. I wanted the start of the level to seem like antarctic plains, with snowy hills to populate the background. This level will feature slippy floors what means harder gameplay and puzzle elements like sliding blocks to advance. 

The main idea of these concepts is to get a feel of the depth and the types of platforms in each environment, but also I thought it would be a nice idea to have each level go through two different area types - 

World 1 : Forest - Ruined temple.  
World 2 : Snowy Plains - Ice Cavern
World 3 : Lava Mountains - Volcano

While the gameplay is nothing new, we are hoping to bring out new and exciting mechanics through the each individual levels.
We have gone through several ideas on how the levels will work. One of the thought processes were having each level divided into sections, first half of the level would be platforming while the second half will contain a puzzle or two before you can advance. This is something to consider a little later on in development as one of our main concerns is whether switching to the mechanic will break the speed and the flow of the retro style platformer we're aiming for. We want the Mechanic to be controllable by either keyboard controls or even possibly the mouse, as this is the change the gameplay up a little during play to either complete puzzles or to change the environment so you can proceed.

Each level has a game changing mechanic to advance difficulty throughout.

The first forest level shall contain various points where there is winds, either blowing from below to reach further jumps and to give the player more of a challenge.

The second Ice level will contain Ice floors. This is will be to challenge the player and for other puzzle elements. Slippy platforms will make it harder to control the character or even moveable blocks on the icy floor to use for different puzzles.

The third Fire level will contain more environmental hazards of any other level. Meteors falling from the sky and volcanic magma rolling across the floor. On this level the platforms shall move too, something that wouldn't previously be in any other levels and also keeping puzzles to a minimum as we want this level to solely rely on platforming. While all generic platforms have you running and jumping to the left we wanted another idea to be to switch to vertical style platforming half way through the level.

Our last and final level is going to be a mixture of all 3 previous levels. By using platforms and mechanics from the other levels to increase the difficulty; Forest winds, Icy platforms and fire hazards. The level will be based off technology and glitches, and being inside the game. Another idea for this level was to be 'chased' by the game breaking glitch or 'binary' so the level cannot be done slow. This will hopefully add speed and difficulty to the final level.

Monday, 4 November 2013

Concepts - MainCharacter Game Dev

Here is several sketches of ideas for the main character. I wanted him to be a loveable guy with a reconizeable silhouette. I want to hopefully paint this up as a concept poster at some point down the line, maybe even for the final degree show.


Here is a colored sketch that i whipped up in photoshop to get an idea of the
 different views for better reference when 3d modeling.

I have also been working on a test model based off the earlier concepts. Here is a ambient occlusion wireframe render of the main character, this will not be used in game as i will most likely redo the model from a more finalized concept but this gave me a nice idea of how the character could look. Gave me a nice idea of his overall structure and build.  


Here is the finished main character, this is the guy we have decided to go with. Mixing many ideas from mine and elliotts we have chosen a cartoony retro looking nerd. 


We have not decided whether we are going to have the messenger bag due to rigging and animating purposes but once i have done a few tests we will be able to see if it is possible.  

You can also see that we plan to use several textures for different environmental effects. Obviously depending on the area the main characters textures could change to give the effect of the character being in muddy/snowy or volcanic ash terrain. 

I am planning on starting the 3D model based off this design soon.


Tuesday, 29 October 2013

Movement and Shader Scripting

As it stands I have been focusing on scripting a character movement system and some basic toon shaders for our game. So far I have a basic working movement prototype and our first shader finished.

Character Movement


The above screenshot shows the test scene that I have set up to test the character movement scripts. As it stands the current features of this script are as follows;


  • Basic 2D movement along the X axis.
    • This includes running and walking functionality.
  • Basic jumping.
    • Jumping heights vary depending on the current speed of the character.
    • The ability to control the character while jumping against the characters current speed.
  • Directional Rotation.
    • The character rotates towards the camera in 3D space to face the direction in which it is moving.
While there are currently not very many features to this script over time I intend to expand upon it to incorporate the use of;
  • Momentum and sliding.
  • The ability to jump off from a wall.
  • Movement acceleration.
  • Other physics interactions.
Toon Shader

While having scripted this I have also been working on a fairly basic toon shader for our game. While this is usually something that would be done much later in development I decided to do it early on in case any issues arose that could potentially result in us having to change the games visual style. Below is a screenshot of the unity scene that I have been using to test the toon shader.


The toon shader has a few editable properties that can be used to change its appearance;
  • The amount of shading bands can be changed to alter the "blockiness" of the shading.
  • There is a property that allows you to limit the amount of colours used by the shader's base texture.
  • It is also possible to change the size of the models outline.
Currently the shader gives a really nice visual style to the 3D assets that I have tested it with, there are however a large amount of changes that I would like to make. The first is that due to the way in which it has been written, when the 3D assets are set to receive shadows its causes some visual artifacts where the toon shading and the received shadows overlap.

I would also like to change the way in which the outline is created. Currently it is done by using rim lighting that is set as solid black, this creates a nice affect but is often predictable and can create strangely shaped outlines with some assets.

Friday, 25 October 2013

All Character Concepts

Character Concepts
By Elliot Bird


The Designer
The main character for the game, a scruffy, student computer game designer or gamer.

Here, i have tried to achieve a cell shaded look.
i have also changed the texture to emphasise the sense of being in different worlds.


Standard Enemy

Design 1

Started with a basic design that could possibly be used in all game world. For each we would add little accessories relating to the environment to give more of a specific world effect.


After painting the ice concept i did a few colour variations of each monster to see if they might be used in all wordls however they look a bit too specific to their own worlds to be used across each one.


 After having a group discussion we decided the best thing to do would be to design 3 enemies,
- Standard (roaming enemy)
- Projectile (enemy that fires missiles)
- Arial (Flying enemy)

and then texture each enemy 3 times one texture per world, allowing us to use the same enemy mesh across all levels.

Here is the base for the standard enemy, based on a hedgehog. It will patrol platforms back and forth and kills you when collided with.

Design 2


 Colour Variations - According to worlds
 

Accessories added to make clear what worlds the monsters belong to
 

The accessories couldn't be part of the base mesh so they are attributes that would have to be added after the creation of the base.

Rather happy with these designs, the creature looks reasonably feasible and as if each are suited to there assigned environment

We also discussed the possibility of having two strengths of standard enemy, one being the standard creature without accessories and one set with accessories that maybe take two hits instead of one to defeat adding to the difficulty aspect of the game.

Projectile Enemy?

Using the standard enemy as a base i added in some glowing orbs that they could possibly shoot at you with some kind of power. Still unsure about this however

as a group we decided that it would be better visually to have a specific enemy for projectile attacks rather than re-use a previous design.

Arial Enemy

This concept is for the arial enemy, based on a jellyfish, but combined with the standard enemy concept to create a consistant look. Again i have given them colourways so as to indicate their relavance to each level/world.

It will be located in the air floating smoothly up and down inbetween two platforms. Like the standard enemy, if collided with you will perish, you can either use timing and pass it at a convienient point of its animation cycle or jump on it to defeat it.


'Bug' Enemy

The bug enemy is an enemy that patrols platforms but can 'stick' to it so to speak, it will be able to traverse along the top of the platform as well as crawl along the underside of them making it hard to jump or navigate below a bug inhabited platform. These enemys will appear most in the binary level, where 'The Designer' has managed to finally access the code behind the game.

Design 1

The glitch enemy will start appear towards the final level and is not an enemy that the 'Designer' is meant to have designed. it is a being created by the glitches in the game that are attempting to eradicate you from their world.

Due to the fact that a glitch or mechine has created these enemys i have tried to keep to quite a robotic design that feels cold and unrelatable to the fluffyness of the usual enemys you will come across.


After a group discussion we decided that this enemy had too many humanoid attributes for something that was meant to be a 'bug' in the game, however we did think it would make a good final boss when made 10 or 20 times bigger than the Designer himself.

Design 2

  A rough design for the Bug enemy that is more of an accurate visualization of what we had in mind for this type of enemy.


A set of possible movements for the character giving us a clearer view of how it might look in game

This design i do not feel fills the criteria we are aiming for, it needs to have more bug-like features as opposed to the robotic ones i have chosen to make clear in these designs. Things like several eyes and multiple limbs and antena would add to the bug like qualities i am aiming to achieve.

These bugs represent faults in the game and come from the game therefore i have designed them with an electrical current running through them to give a sense that the game is powering them. 


Colour ways, not too keen and these enemy's


Design 3 & 4

In opposition to Design 2 these designs are very strong in appearance whereas design 2 looks a bit feeble and un-bug-like.


These designs i feel are effective, although with a realistic style, i think it would work as a good contrast to the current soft cartoony feel and as enemies would pose more of a threat to the 'Designers' world.

Design 5


Design 6 & 7 (Silhouettes)