Labels

Wednesday 26 March 2014

Fire Level Construction


 Fire Level Elements


After blocking out the basic positions of the grey box export from unity in maya, The mesh was manipulated and shaped in order to further enhance the environmental features. Using a team mate's sketch puzzles were also blocked out. Minor changes regarding the position of vertexes occurred in order to best suit the final outcome seen below.


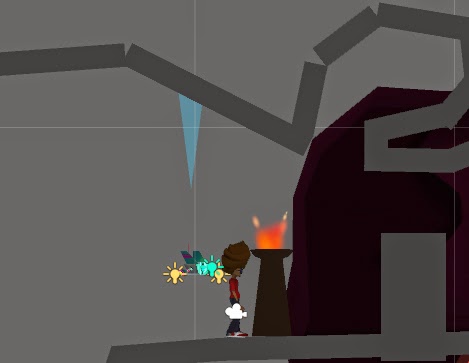
Only Volcano and Background pieces used for examples although methods applied to all meshes.


The Fire Level Environment is made up of various 3d meshes, Using the colour palet I applied colour to selected faces on the chosen objects. 


Due to unitys light mapping system I was required to split the larger meshes into smaller pieces using 'detach component' in Maya.. The animation for the enviromental features that move was done in unity.
Here, the background pieces are shown and rendered, the render will be exported and applied to a plane.


Here are the final assets for the fire level, the same process has been applied to them and these are mantal ray renders. Objects like the rock door 1 & 2 and falling boulder will be coded in unity the others, just static visuals, platforms are also occasionally animated.


Mechanic's Electro Ball

The mechanic's electric ball is made from a sphere and a texture that has had an alpha channel applied to it (shown below)


This is the .tga that allows the selected areas to show within unity, in this case 'white' within the image will appear see through. this was created in Photoshop by... 

- drawing a jagged pattern 
- creating 2 copies 1 blue 1 white
- blur blue lines
- create alpha channel


The white part of the texture is being affected by the alpha channel and this is turn leads to a forcefield type effect


This will be parented to the mechanic character in unity and will animate to the correct controls.


Tuesday 25 March 2014

Mechanic Animation


The mechanic is made up of 4 separate parts
1.Body
2.Left Arm
3.Right Arm
4.Antena 1&2

The body position itself did not need to be animated as it was being coded, the arm's pivot points were positioned where they connect to the body and rotated around the z axis in order to keep them connected during the animation process.


1st Key Frame: Both the arms starting position

24th Key Frame: The highest point the arms will reach

48th Key Frame: returns the arms to the starting point


The antenna's movements are subtle but give the mechanic more character, it was done but simply moving the top vertices on the arial shown below.


(Timeline in Above img)

50th Key Frame: Antena 1 & 2 starting point

60th Key Frame: Antena 2 second position

66th Key Frame: Antena 1 second position

80th Key Frame: Antena 1 & 2 back to original position

96th Key Frame: End

Unity can manipulate timelines of animations allowing us to cut out the 16 empty frames from 80 to 96 rather than shorten it in Maya

Arial Enemy Animation

Animating the arial enemy was straight forward. After binding the bones to the body with 'smooth bind' I was able to manipulate the tentacles. By setting up a timeline, I was able to create key frames of the enemy's position. I did this by rotating each bone to create a curve. 

1st Key Frame: The Arial enemy's tentacle curves to the left side slightly.


48th Key Frame: halfway through timeline Tentacles curve to the right


96th Key Frame: The end is a copy and paste of the 1st Key Frames positioning in order to ensure loop-ability


Monday 24 March 2014

Arial Enemy


Here is the arial enemy's mesh and texture for the forest level, like the standard enemy the mesh will remain the same but the textures will change depending on what environment they are placed within. the bottom screen shot (Left) shows the bones. The animation will consist of small tentacle movements as actual object movement will be applied in Unity.
 
Here are the Different Textures


The Fur on the top of the head and the chin is just a ring of one sided polys with an alpha map on it, the black is what will not show up, the alpha channel stays the same but the colour of the texture is swapped for each enemy
 
 
 The animation is fairly straight forward for these guys, the bones ive created will just sway a little and i removed the influence of them on the head of the creature so only the tentacles will move


Mechanic Model - Texture


This model is fairly basic, the arms are seperate components in order to make them animatable seperate form the body. The animation applied is a smooth movement of the arms moving up and down in order to add to the effect of floating which has been scripted by Luke in Unity. The orange spheres at the end of each arm are the 'Engines' we will add a particle effect around these as well as a blue-ish glow around the lense to make the Mechanic look both more alive and like a working machine.

when the mechanic interacts with objects he will now produce what looks like an electricle current which is actually an animated sphere with an alpha map on it. This is a visual representation of an interaction that will indicate to the player that the attempted control has worked.


Textures

Mechanic Arm


Mechanic Body

In photoshop I created the effect of raised panels by using the emboss filter on the specific layers giving the texture a bit more depth


Mechanic Engines


Mechanic Lense


Mechanic Body UV Snapshot


Mechanic Arm UV Snapshot


Friday 21 March 2014

Puzzle and Level Mechanics - Fire

Once the Ice section mechanics were finished I moved to to the mechanics of the fire level. Some of the mechanics have been shared between sections, such as the moving / falling platforms. The Fire section was designed with only one large puzzle as it was decided that to increase the difficulty, the level would be more focus around difficult platforming mechanics.

The first part of the Fire section is a vertical ascent up the inside of a volcano. As you scale the volcano there is lava that rises below you. This was a fairly simple mechanic to script as it uses pretty much the same script as the other moving platforms with a few adjustments. You can see it in action below:


In the section following the volcano there are a series of "floating" platforms that are to be used for the player to travel over the lava that they are floating on. These also use similar code to the previous moving platforms, however these platforms move along a path made with a series of waypoints:


The following code shows how the waypoint system has been implemented:


In the same area as the floating platforms there is another level hazard that comes in the form of falling volcanic boulders. There is a series of game objects suspended above the level that each fall at a random speed. Each time a boulder hits the player or another collider, they are destroyed and the boulders position is reset to its starting height but with a random position along the X axis so that no pattern is formed to increase the difficulty:


This code snippet shows how the rocks are repositioned and how their falling speed is set:


As the section that is to follow the fire section has no puzzles, the final puzzle in the fire section is much more complex than previous puzzles. The mechanic behind the puzzle is a series of 3 buttons that must be pressed in specific orders to open certain doors. Following the section with the 3 buttons the player is faced with a large door. To open the door a button or lever must be interacted with to open the door. Each time the button is pressed the door only opens a small amount and will continuously close. In order to make it through the player must keep pressing the button until the door is raised fully and then run to make it under the door before it closes.


This code shows how the ordering of the 3 buttons is managed. It proved to be quite difficult to script this as it had to be possible to press the buttons in the incorrect order and have them reset so that you had to start the order again.


Thursday 20 March 2014

Individual Level Grass

The other day i sumbled across a video called 'Grass secrets' this showed a very simple technique to get a really nice grass effect. Simply by changing the shape dynamics control to fade and also using color dynamics in the brush settings. This is a super awesome technique that i will be using in the future. 

(https://www.youtube.com/watch?v=6Oy18_Zb1S8&feature=youtu.be) 


Using the level colour schemes that i had already determined, i created three separate grass textures for each level. Took no time at all.


Here they are applied to three planes in Maya, this give a rough idea of how it would look in-game. 


Wednesday 19 March 2014

Level Colour Schemes

Due to the visual changes, we are using bold block colours for each of our environments and assets. As each environment will only have about 5 main colours, i believe it is really important to make sure all these colours work well together.


By using Adobe Kuler i took a slight dabble in colour theory, using the Adobe algorithms to automatically find out what colour work well together. I already knew that we wanted a desaturated pasty colour scheme so kuler helped find what combination of colours to use.


Here is the colour scheme for the forest level, we wanted this to be your 'typical' first level. Using only green and brown (for grass, dirt and trees) this will hopefully work well with the low poly look much like the references we have been looking at. 


For the Ice level, these work well to get a 'cool' feel to the environment. 


At first for the fire level i thought typically we would just use reds and very dark colours, but i quite like these stylised colours, and how they work together. 

I have also typed up the Hex and RGB values so we can get the exact same colours no matter what software we are using. This will help make sure we keep consistent within the levels. I've also marked what colour will be used for what, once again to keep consistent. 

Monday 17 March 2014

Puzzle and Level Mechanics - Ice

Similarly to the Forest section, the Ice section has several small puzzles incorporated into the levels design. As well as a few small level mechanics that have been implemented to create more of a challenge and to give the game more depth.

The first things that were done was to script and implement the less complex mechanics; the moving platforms, water level and the breakable ice platforms. These were fairly simple to get done as for the most part they consisted of just controlling the position of each object and moving it accordingly. Below is a screenshot of the breakable ice platform in action:


Another key mechanic in the game was the falling icicles. These are environmental hazards that are triggered to fall from the ceiling when the player walks below them.


This has been achieved using a combination of trigger colliders and raycasting. The raycasting has been used to fire a ray directly down from the source icicle to detect whether the player has walked underneath the icicle. Once this trigger has occurred the icicle will begin to fall. It has two triggers attached that will execute the code to "kill" the player if the two collide. 


Similarly to the falling icicles that are hazards, we also have another special type of icicle that allows the player to wall jump from them to progress to the next section of the level. The code for these is effectively the same, however they will not harm the player. The wall jump icicles are also part of a slightly bigger puzzle. They have been position too high to reach normally, so to reach these the player has to interact with the environment to free a block of ice that can be position to give you a height boost to reach the icicles.


The final and most complex puzzle in the Ice section of our game is the torch and ice wall puzzle. This puzzle consists of four main elements. Two collectables (a stick and some flint), a torch and a wall made of ice. The player will collect the flint and stick during their play through and will eventually come to a wall that is blocking their way. Using the stick and flint the player can light the torch next to the wall which will melt it, allowing them to progress.


The effect of the wall melting has been achieved by manually modifying the walls scale and positional values. This gives the impression that the wall is shrinking. In the final version of the game particle effects will be used to create steam to improve the visual aspect of the puzzle.


Friday 14 March 2014

Grey Boxing - Ice and Fire Sections

Following the completion of the level design sketches I have grey boxed the Ice and Fire sections of our level. This also includes setting up our basic level mechanics to an acceptable standard.


Thursday 13 March 2014

Forest Level, Main platforms and environmental assets.

This week i have mainly been blocking out the main platforms according the the level sketches and the grey box we already have up and running. Now that most of the character controller is sorted and we have some rough animations, we are now moving on the quickly get the visual in the game. Using the low poly blocky coloured look i disscussed previously, i have modeled and used a simple coloured lambert.
 
Starting area
Key elements: Learning to jump

 
Second screen
Key elements: Learning to crouch and finding the mechanic. First puzzle here.
 
 
Third screen
Key elements: More platforming, Hazards that can cause death for the first time.

 
Fourth Screen
Key elements: Wind mechanic, Crouching and dodging.